How to Hugo: Part 1

Preamble
Hugo is a static site generator that allows you to create and manage websites without the need for a database or application server. Once setup, you can focus on creating content and leave maintenance to the CDN (Content Delivery Network) provider.
The advantage of Hugo compared to other static site generators, is the fast build times and native support for Markdown and other document languages.
In this guide, we’ll cover the basics of working with Hugo, including creating content, customising templates, and styling with HTML and SCSS.
Hugo sites are also capable of dynamic behaviour and interacting with web services like any other website. We won’t cover that in this guide, we’ll focus on static content and styling.
My motivation for writing this guide is finding that the documentation and books on Hugo don’t provide a clear and concise guide for a beginner to get a site up and running in a short amount of time. So I’ll try to keep the word count down to a minimum.
This website was originally built using my own JavaScript CMS to display Markdown content, but has since been migrated to Hugo, which has made it easier to update and maintain.
Who is this for?
If you are looking for a methodology to create a website that makes it easy to update with minimal maintenance, then this guide and hugo are for you.
The reader would benefit from having a basic understanding of HTML and CSS, which won’t be covered in this guide.
Kinds of websites that this guide can help with:
- Personal blogs
- Portfolio sites
- Documentation sites
- Static landing pages
We will cover deployment in a later guide.
Requirements
- Linux or WSL2 terminal
curl
Contents
How does Hugo work?
With Hugo, you define different kinds of content called “archetypes” and then using a document format like Markdown, you create content based on that archetype. These archetypes can be used to create different types of pages like blog posts, portfolio items, articles, galleries, etc. An archetype is a template for your content, it’s metadata, placeholder text, and a way to organise your content. (Note: we’ll cover the metadata further down, things like tags, descriptions, dates, etc.)

We define how these pages are rendered using HTML layout templates and styles using HTML and SCSS. SCSS extends CSS with features to keep our styles DRY and maintainable. You can read more about SCSS here, but I’ll cover the basics when we get to styling.
Hugo will build the whole site using all of our templates, styles, content, images, etc. and package it up into a static website that can be hosted anywhere.
1: Getting Started
There are a few things we need to do to set up our hugo project. Throughout this guide there will be checkpoints you
can refer to, these are git branches you can check out to compare your progress or use as a starting point. Terminal
commands will start with $ and terminal output will be shown on the next line.
Underlined filenames like hugo.toml refer to a file you will need to edit or create relative to the project directory.
git setup
We will use git to manage our project files. Git lets us track changes and revert them if needed, it also lets us push our changes to a remote repository like GitHub or GitLab which will be used to deploy our site in a later guide.
Check if you have git
$ git --version
git version 2.53.0
If you don’t have git installed, you can download it from here.
We will also need git-lfs, a git extension that allows us to store large files.
Check if you have git lfs
$ git lfs version
git-lfs/3.7.1 ...
If you don’t have git-lfs installed, then on linux check if your distro provides a git-lfs package or on mac install
using homebrew or download it
from here.
You will then need to install it for your user account.
$ git lfs install
project folder
Create a folder for your project and change into it:
$ mkdir how-to-hugo
$ cd how-to-hugo
Initialise a git repository and change the branch to main:
$ git init
$ git branch -m main
We don’t want git to track everything in our project. We use a file named .gitignore to tell git which files to ignore. Create this file and add the following lines to it.
.gitignore
# Generated files by hugo
/public/
/resources/_gen/
/assets/jsconfig.json
hugo_stats.json
Create a file named .gitattributes to tell git-lfs which files to track. This helps git to store large files like
images, videos, and binaries.
.gitattributes
# Archives
*.7z filter=lfs diff=lfs merge=lfs -text
*.br filter=lfs diff=lfs merge=lfs -text
*.gz filter=lfs diff=lfs merge=lfs -text
*.tar filter=lfs diff=lfs merge=lfs -text
*.zip filter=lfs diff=lfs merge=lfs -text

# Documents
*.pdf filter=lfs diff=lfs merge=lfs -text

# Images
*.gif filter=lfs diff=lfs merge=lfs -text
*.ico filter=lfs diff=lfs merge=lfs -text
*.jpg filter=lfs diff=lfs merge=lfs -text
*.png filter=lfs diff=lfs merge=lfs -text
*.psd filter=lfs diff=lfs merge=lfs -text
*.webp filter=lfs diff=lfs merge=lfs -text

# Fonts
*.woff2 filter=lfs diff=lfs merge=lfs -text

# Other
*.exe filter=lfs diff=lfs merge=lfs -text
.bin/dart-sass/src/dart filter=lfs diff=lfs merge=lfs -text
.bin/hugo/hugo filter=lfs diff=lfs merge=lfs -text
get hugo + dart sass
We will keep our hugo binary within our project folder, and it will use Dart Sass to compile our SCSS styles.
We will use the following binary versions for this guide, you can adjust the commands to use newer versions.
- Hugo: 0.158.0
- Dart sass: 1.98.0
make a directory for our binaries
$ mkdir -p .bin/hugo
Linux/WSL2
get dart sass
$ curl -sLJO "https://github.com/sass/dart-sass/releases/download/1.98.0/dart-sass-1.98.0-linux-x64.tar.gz"
$ tar -C .bin -xf "dart-sass-1.98.0-linux-x64.tar.gz"
$ rm "dart-sass-1.98.0-linux-x64.tar.gz"
get hugo
$ curl -sLJO "https://github.com/gohugoio/hugo/releases/download/v0.158.0/hugo_extended_0.158.0_linux-amd64.tar.gz"
$ tar -C ".bin/hugo" -xf "hugo_extended_0.158.0_linux-amd64.tar.gz"
$ rm "hugo_extended_0.158.0_linux-amd64.tar.gz"
Helper script
We will create a helper script to make it easier to run hugo commands. Create a file named hugo and add the following
lines to it.
hugo
#!/usr/bin/env sh

export PATH="$(pwd)/.bin/dart-sass:$PATH"

.bin/hugo/hugo "$@"
make the file executable
$ chmod +x hugo
Initialise hugo project
We will use the new command to initialise our hugo project in our project folder.
$ ./hugo new project . --force
We also want git to keep track of empty directories or they will dissapear whenever we check out the project,
the following command will create a .gitkeep file in each empty directory.
$ find . -type d -empty -not -path './.git/*' -exec touch {}/.gitkeep \;
Checkpoint 1: starting point
we can now commit our changes.
$ git add .
$ git commit -m "1: starting point"
Commiting our changes creates a “commit”, which is a snapshot of our project at that point in time. Feel free to commit as often as you like.
Find the project up to this point here.
2: Create a theme
A theme acts like a master template that we can override with our own styles and layouts.
You can find ready-made themes here to use in your projects.
For this guide we will create our own theme, so we gain an understanding of how themes work.
New theme command
Hugo can create a new theme using the new command.
Create a theme
$ ./hugo new theme my-theme
You’ll find that hugo created a folder themes/my-theme. This folder contains a basic structure for a hugo theme with some example content and layout templates.
Hugo theme structure
themes/
└── my-theme
    ├── archetypes
    │   └── default.md
    ├── assets
    │   ├── css
    │   │   ├── components
    │   │   │   ├── footer.css
    │   │   │   └── header.css
    │   │   └── main.css
    │   └── js
    │       └── main.js
    ├── content
    │   ├── _index.md
    │   └── posts
    │       ├── _index.md
    │       ├── post-1.md
    │       ├── post-2.md
    │       └── post-3
    │           ├── bryce-canyon.jpg
    │           └── index.md
    ├── data
    ├── hugo.toml
    ├── i18n
    ├── layouts
    │   ├── baseof.html
    │   ├── home.html
    │   ├── page.html
    │   ├── _partials
    │   │   ├── footer.html
    │   │   ├── head
    │   │   │   ├── css.html
    │   │   │   └── js.html
    │   │   ├── header.html
    │   │   ├── head.html
    │   │   ├── menu.html
    │   │   └── terms.html
    │   ├── section.html
    │   ├── taxonomy.html
    │   └── term.html
    └── static
        └── favicon.ico
We should also add .gitkeep files to all empty directories so git tracks those directories.
from the root of the project:
$ find . -type d -empty -not -path './.git/*' -exec touch {}/.gitkeep \;
To use the theme, we need to add it to our project configuration hugo.toml file.
hugo.toml
baseURL = 'https://example.org/'
locale = 'en-us'
title = 'My New Hugo Project'
theme = 'my-theme'
Development Server
The hugo binary includes a built-in web server to preview our site.
start the development server
$ ./hugo server
By default, the server will run on port 1313. You can change this by adding a --port flag to the command
./hugo server --port 8080 for example.
For now assuming you are running the server on port 1313, navigate to http://localhost:1313 in your browser.
You should see something like this:

At this point you should explore the site, note that we have a home page, posts page and tags page.
You can stop the server by pressing Ctrl+C in the terminal. Keep in mind that the server will reload your changes automatically, but sometimes needs to be restarted.
Checkpoint 2: theme created
Let’s commit our changes.
$ git add .
$ git commit -m "2: theme created"
Find the project up to this point here.
3: Content
Now that we have a functional site, we can start adding content.
Create a new post
create a new post
$ ./hugo new posts/my-first-post.md
Content "/home/user/Projects/how-to-hugo/content/posts/my-first-post.md" created
Let’s take a look at the new file.
content/posts/my-first-post.md
+++
date = '2026-04-06T23:58:33+01:00'
draft = true
title = 'My First Post'
+++
The area between the +++ lines is called “front matter”, which contains metadata about the page like the date, title,
and whether it’s a draft or not. This front matter is based on an “archetype” which acts as a content template.
archetypes/default.md
+++
date = '{{ .Date }}'
draft = true
title = '{{ replace .File.ContentBaseName "-" " " | title }}'
+++
statements like '{{ .Date }}' use the Go template syntax to insert the
current date and time into the metadata. We’ll cover the template syntax in a later section.
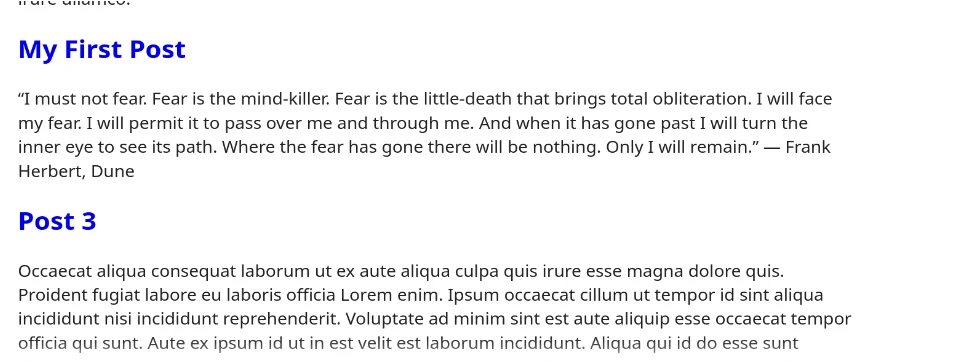
Edit the post
Add some content to the post… a quote from Dune.
content/posts/my-first-post.md
+++
date = '2026-04-06T23:58:33+01:00'
draft = true
title = 'My First Post'
+++

“I must not fear. Fear is the mind-killer. Fear is the little-death that brings total obliteration. I will face my fear.
I will permit it to pass over me and through me. And when it has gone past I will turn the inner eye to see its path.
Where the fear has gone there will be nothing. Only I will remain.”
― Frank Herbert, Dune
If we now run ./hugo server (if it’s not already running) we won’t see the new post because it’s a draft.
Preview draft content
Hugo will render drafts with the --buildDrafts flag.
$ ./hugo server --buildDrafts
We should now see our new post listed:
Leaf bundles
Currently, you’ll notice that the post we just created is organised directly under the posts section. But we often want to group our content with related media like images, to that end we can create leaf bundles.
create a new leaf bundle
$ ./hugo new posts/my-first-bundle/index.md
Our content directory will now look like this:
content/
└── posts
    ├── my-first-bundle
    │   └── index.md
    └── my-first-post.md
Leaf bundles are directories that contain an index.md file which represents the content of the leaf bundle.
Let’s add an image to the leaf bundle, you can add any you want or use the command below to add a sample image.
$ curl -sL "https://picsum.photos/400/300?grayscale" -o content/posts/my-first-bundle/sample.jpg
Let’s add that image to the bundle content.
content/posts/my-first-bundle/index.md
+++
date = '2026-04-08T03:46:18+01:00'
draft = true
title = 'My First Bundle'
+++
Wow this is a bundle!

We can now preview the bundle content:

“Publish” the post
When we’re happy with the content of a post we can mark it read to “publish” by removing the draft = true
line from the front matter.
content/posts/my-first-post.md
+++
date = '2026-04-06T23:58:33+01:00'
draft = false
title = 'My First Post'
+++

“I must not fear. Fear is the mind-killer. Fear is the little-death that brings total obliteration. I will face my fear.
I will permit it to pass over me and through me. And when it has gone past I will turn the inner eye to see its path.
Where the fear has gone there will be nothing. Only I will remain.”
― Frank Herbert, Dune
content/posts/my-first-bundle/index.md
+++
date = '2026-04-08T03:46:18+01:00'
draft = false
title = 'My First Bundle'
+++
Wow this is a bundle!

Now when we run ./hugo server we should see our new posts:
$ ./hugo server
Checkpoint 3: add content
Let’s commit our changes.
$ git add .
$ git commit -m "3: add content"
Find the project up to this point here.
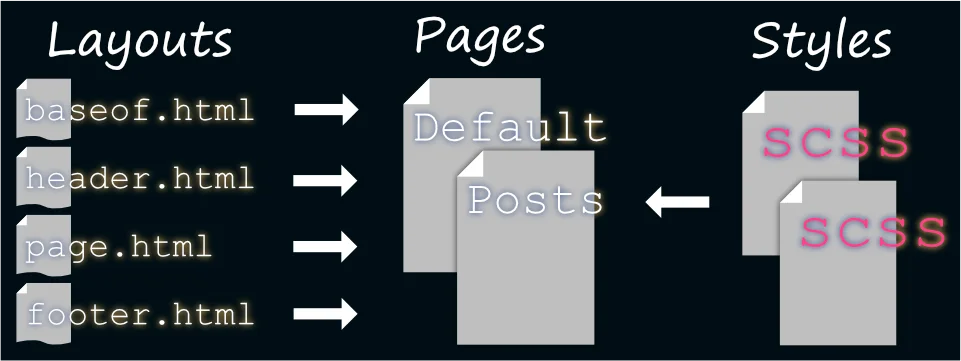
4: HTML Layouts
Layouts are templates that define the HTML structure of a page. Each page will first find a matching baseof.html
layout, then it will fill in all the partial layouts like menus, headers, footers, etc. Layouts also control where a
page’s content will be placed.
In this section we’ll look at hugo’s template syntax and then explore the layouts provided by the theme.
Template syntax
Hugo uses Go’s HTML and text template packages to render HTML files. You can read more about the syntax here.
We’ll cover the basics by looking at a few examples.
Template Statements
Template statements are enclosed in double curly braces {{ }}.
The following will output “Hello World” within the <h1> tag.
<h1>{{ "Hello World" }}</h1>
You will also see {{- and -}} brackets. These brackets are used to remove whitespace from the output but otherwise
have no effect.
The dot context
| |
The . holds the context in the current scope of the template.
- Line 1:
{{ .Title }}is in the scope of the page so will output the title of the page. - Line 4:
{{ . }}is in the scope of therangestatement and will output each item in the slice. - Line 8:
{{ . }}is in the scope of thewithstatement and will output the string “baz”.
If the page has the title “My First Post” then the above template will output:
<h1>My First Post</h1>
<p>foo</p>
<p>bar</p>
<p>baz</p>
Variables
:=assigns a value to a$variable.=assigns a value to a local variable.
{{ $foo := "bar" }}
<p>{{ $foo }}</p>

{{ $foo = "baz" }}
<p>{{ $foo }}</p>
will output:
<p>bar</p>
<p>baz</p>
Loops
We enter a loop with range and exit it with end.
{{ range 3 }}
  <p>{{ . }}</p>
{{ end }}
will output:
<p>0</p>
<p>1</p>
<p>2</p>
We can also iterate over a slice which is a collection of items.
{{ range slice "foo" "bar" "baz" }}
  <p>{{ . }}</p>
{{ end }}
will output:
<p>foo</p>
<p>bar</p>
<p>baz</p>
Conditionals and Context
We can enter a conditional with if and exit it with end. We can use else and else if to handle
the case where the condition is not met.
{{ if $active }}
  <p>active</p>
{{ else }}
  <p>inactive</p>
{{ end }}
We can use and to test if all conditions are met.
{{ if and $switch1 $switch2 }}
  <p>All switches are on</p>
{{ else }}
  <p>at least one switch is off</p>
{{ end }}
We can also use or to test if any condition is met.
{{ if or $switch1 $switch2 }}
  <p>At least one switch is on</p>
{{ else }}
  <p>All switches are off</p>
{{ end }}
We can rebind the context of a template with with which can be used to conditionally render some content. We can also
use else with to test other conditions.
{{ with $active }}
  <p>active</p>
{{ else with $overridden }}
  <p>overridden</p>
{{ else }}
  <p>inactive</p>
{{ end }}
Shortcodes
Shortcodes are a way to add custom HTML to a page and reuse common HTML snippets. Hugo provides a few shortcodes out of the box, read about them here.
details shortcode
  See the details
  This is a bold word.
details shortcode output
<details>
  <summary>See the details</summary>
  <p>This is a <strong>bold</strong> word.</p>
</details>
We’ll add our own shortcode later.
Layouts provided by the theme
Let’s now take a look at some of the layouts provided by the theme.
base template
This is the first layout that all pages will use. It adds partial layouts for the head, header, and footer. The block
statement allows us to define a block of content that can be overridden by child layouts.
themes/my-theme/layouts/baseof.html
<!DOCTYPE html>
<html lang="{{ site.Language.Locale }}" dir="{{ or site.Language.Direction `ltr` }}">
<head>
  {{ partial "head.html" . }}
</head>
<body>
  <header>
    {{ partial "header.html" . }}
  </header>
  <main>
    {{ block "main" . }}{{ end }}
  </main>
  <footer>
    {{ partial "footer.html" . }}
  </footer>
</body>
</html>
Page Template
This template will be used for all content pages, we define the “main” block that will replace
{{ block "main" . }}{{ end }} in the baseof.html layout.
themes/my-theme/layouts/page.html
{{ define "main" }}
<h1>{{ .Title }}</h1>

{{ $dateMachine := .Date | time.Format "2006-01-02T15:04:05-07:00" }}
{{ $dateHuman := .Date | time.Format ":date_long" }}
<time datetime="{{ $dateMachine }}">{{ $dateHuman }}</time>

{{ .Content }}
{{ partial "terms.html" (dict "taxonomy" "tags" "page" .) }}
{{ end }}
This template renders a time string with .Date taken from the front matter date field. The time.Format function
formats the date string for humans and machines. The | operator allows us to pass the output of one statement to the
input of another. In this case we’re passing the date string to the time.Format function.
The {{ .Content }} statement will render the content of the page, which is the text after the front matter +++ line.
Let’s now explain the {{ partial "terms.html" (dict "taxonomy" "tags" "page" .) }} part which renders the tags for
the page:
partial "terms.html"pulls in the partial template inthemes/my-theme/layouts/_partials/terms.html(dict "taxonomy" "tags" "page" .)is passed to the partial template as the.contextdictcreates a new dictionary (key-value map), passing each key and value as arguments:"taxonomy" "tags"mapstaxonomy=tags"page" .mapspage=.passing in the current page context within thepagekey.
Other Templates
section.htmldisplays a list of pages in a section like “posts”.taxonomy.htmldisplays a list of terms in a taxonomy like “tags”.term.htmldisplays a list of pages with a given term.
Overriding the post layout
We can override the layout of a page by creating a directory named after the section in the layouts directory.
Create a posts directory
$ mkdir themes/my-theme/layouts/posts
Create an override layout for posts
$ cp themes/my-theme/layouts/page.html themes/my-theme/layouts/posts/page.html
Add an author to posts page layout
themes/my-theme/layouts/posts/page.html
{{ define "main" }}
  <h1>{{ .Title }}</h1>

  <ul>
    {{- with .Params.author -}}
    <li>By {{ . }}</li>
    {{- end -}}
    <li>
      {{- $dateMachine := .Date | time.Format "2006-01-02T15:04:05-07:00" -}}
      {{- $dateHuman := .Date | time.Format ":date_long" -}}
      <time datetime="{{ $dateMachine }}">{{ $dateHuman }}</time>
    </li>
  </ul>

  {{ .Content }}
  {{ partial "terms.html" (dict "taxonomy" "tags" "page" .) }}
{{ end }}
Add an author to a post
content/posts/my-first-bundle/index.md
+++
date = '2026-04-08T03:46:18+01:00'
draft = false
title = 'My First Bundle'
[params]
author = 'bob'
+++
Wow this is a bundle!

We use params to pass in custom parameters to a page.
Keep in mind that by default hugo uses the toml format for configuration and front matter. I think YAML is more readable, and we’ll look at converting to YAML as an optional step later.
Re-organize Navigation
Let’s remove the title from the header partial and move it inside the nav tag.
themes/my-theme/layouts/_partials/header.html
<h1>{{ site.Title }}</h1>
{{ partial "menu.html" (dict "menuID" "main" "page" .) }}
remove the <h1> tag
{{ partial "menu.html" (dict "menuID" "main" "page" .) }}
Add the site title to the nav tag
themes/my-theme/layouts/_partials/menu.html (truncated)
| |
Checkpoint 4: Updated layouts
Let’s commit our changes.
$ git add .
$ git commit -m "4: updated layouts"
Find the project up to this point here.
5: Styles with SCSS
We have already included dart-sass in our project, which lets us use the latest SCSS features. Refer to the official documentation to learn more about SCSS.
Transpile SCSS to CSS
To use SCSS, we need to tell hugo to transpile our SCSS to CSS.
themes/my-theme/layouts/_partials/head/css.html
{{ with resources.Get "css/main.scss" }}
  {{ $opts := dict
          "enableSourceMap" hugo.IsDevelopment
          "outputStyle" (cond hugo.IsDevelopment "expanded" "compressed")
          "targetPath" "css/main.css"
          "transpiler" "dartsass"
          "vars" site.Params.styles
  }}
  {{ with . | toCSS $opts }}
    {{ if hugo.IsDevelopment }}
      <link rel="stylesheet" href="{{ .RelPermalink }}">
    {{ else }}
      {{ with . | fingerprint }}
        <link rel="stylesheet" href="{{ .RelPermalink }}" integrity="{{ .Data.Integrity }}" crossorigin="anonymous">
      {{ end }}
    {{ end }}
  {{ end }}
{{ end }}
This partial is used by themes/my-theme/layouts/_partials/head.html to include a CSS file.
We use the resources.Get function to get the SCSS file and then use the toCSS function to transpile it to CSS
passing $opts to control how it works. The transpiler option tells hugo to use dart-sass.
SCSS Basics
SCSS lets us write CSS rules in a more concise way.
SCSS nesting
.parent {
  .child-a {
    color: red;
  }

  .child-b {
    color: blue;
  }
}
CSS output
.parent .child-a {
  color: red;
}

.parent .child-b {
  color: blue;
}
We can use the & selector to refer to the parent.
SCSS parent selector
.item {
  &:hover {
    color: blue;
  }
}
CSS output
.item:hover {
  color: blue;
}
We can also use @use to import other SCSS files, allowing us to organise our styles into separate files.
There’s a lot more to SCSS, including functions, mixins, variables, and more. Be sure to check out the official documentation to learn more when you’re ready to dive in.
Re-organize Styles
remove the existing CSS files
$ rm themes/my-theme/assets/css/main.css
$ rm themes/my-theme/assets/css/components/footer.css
$ rm themes/my-theme/assets/css/components/header.css
create all our SCSS files
$ touch themes/my-theme/assets/css/main.scss
$ touch themes/my-theme/assets/css/components/footer.scss
$ touch themes/my-theme/assets/css/components/header.scss
$ touch themes/my-theme/assets/css/components/page.scss
Add SCSS styles
We use some CSS variables to define some colours and use a simple flexbox layout to position the header and footer.
themes/my-theme/assets/css/main.scss
@use "components/header.scss";
@use "components/footer.scss";
@use "components/page.scss";

html{
  --primary-color: #ce4536;
  --light-color: #fdd19b;
  --off-light-color: #e48d62;
  --dark-color: #44131e;
  --off-dark-color: #8a4119;

  height: 100%;
}

body {
  background-color: var(--dark-color);
  color: var(--light-color);
  font-family: sans-serif;
  line-height: 1.5;
  height: 100%;
  box-sizing: border-box;
  margin: 0;
  padding: 0.25rem 1rem;
  display: flex;
  flex-direction: column;
}

a {
  color: var(--primary-color);
  text-decoration: none;

  &:visited {
    color: var(--primary-color);
  }

  &:hover {
    color: var(--off-light-color);
  }
}
themes/my-theme/assets/css/components/page.scss
main {
  flex-grow: 1;

  h1:first-of-type {
    margin-bottom: 0;
  }

  ul:first-of-type {
    margin-top: 0;
    list-style: none;
    display: flex;
    gap: 1rem;
    padding: 0;

    li:first-of-type {
      color: var(--primary-color);
    }

    li:last-of-type {
      color: var(--off-dark-color);
    }
  }
}
themes/my-theme/assets/css/components/header.scss
nav {
  display: flex;
  gap: 2rem;
  align-items: center;

  & > a {
    font-size: 1.6rem;
    font-family: serif;
    text-decoration: none;
  }

  ul {
    list-style: none;
    display: flex;
    gap: 1rem;
    font-size: 1.1rem;

    a {
      text-decoration: underline;
    }
  }

  a {
    color: var(--light-color);

    &:visited {
      color: var(--light-color);
    }

    &:hover {
      color: var(--primary-color);
    }
  }
}
themes/my-theme/assets/css/components/footer.scss
footer {
  flex-grow: 0;
  text-align: center;
}
We haven’t used CSS classes to show how SCSS makes it easier to select elements based on HTML page structure.
Checkpoint 5: SCSS Styles
Let’s commit our changes.
$ git add .
$ git commit -m "5: SCSS styles"
Find the project up to this point here.
6: Customising Content
So far we’ve used the default archetype and used the existing posts section. We’ll go through all the steps to create a new type of content for galleries.
Gallery Archetype
We want this archetype to be defined as a leaf bundle as galleries will contain some number of images.
create a new archetype
$ mkdir themes/my-theme/archetypes/galleries
$ cp themes/my-theme/archetypes/default.md themes/my-theme/archetypes/galleries/index.md
We can place other files in the themes/my-theme/archetypes/galleries directory which will be copied to new galleries
when we create them. This can be useful for placeholder content and enforcing some kind of structure to resources.
Add a placeholder cover image to the archetype
curl -sL "https://picsum.photos/600/400?grayscale" -o themes/my-theme/archetypes/galleries/cover.jpg
For this tutorial we’ll add a cover field to the front matter params.
themes/my-theme/archetypes/galleries/index.md
+++
date = '{{ .Date }}'
draft = true
title = '{{ replace .File.ContentBaseName "-" " " | title }}'
[params]
    cover = 'cover.jpg'
+++

A spiffy description of the gallery.

<!--more-->

A longer description of the gallery.
Notice that we’ve also added some placeholder content. The content before <!--more--> will be used as the summary
for the page.
Gallery Content
add a new gallery page
$ ./hugo new galleries/my-gallery
Notice that hugo has created an index.md for the content and a placeholder cover.jpg.
my-gallery/
├── cover.jpg
└── index.md
add some images to the gallery
$ curl -sL "https://picsum.photos/250/250" -o content/galleries/my-gallery/0.jpg
$ curl -sL "https://picsum.photos/250/250" -o content/galleries/my-gallery/1.jpg
$ curl -sL "https://picsum.photos/250/250" -o content/galleries/my-gallery/2.jpg
$ curl -sL "https://picsum.photos/250/250" -o content/galleries/my-gallery/3.jpg
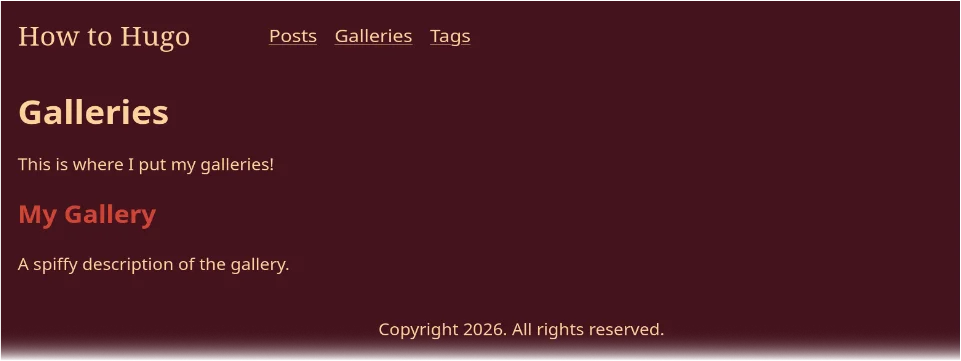
Gallery Section
We can add content to a section by creating an _index.md file in the section directory. This lets you add content to
your section layout where {{ .Content }} is defined.
$ ./hugo new galleries/_index.md
content/galleries/_index.md
+++
date = '2026-04-10T05:49:05+01:00'
draft = true
title = 'Galleries'
+++

This is where I put my galleries!
Update Menu
Our gallery content is draft, we need to use –buildDrafts to preview them
$ ./hugo server --buildDrafts
You’ll notice that the gallery appears on the homepage but there’s no galleries section in the menu.

We configure the menu in our hugo config file.
hugo.toml
baseURL = 'https://example.org/'
locale = 'en-us'
title = 'How to Hugo'
theme = 'my-theme'

[menus]
    [[menus.main]]
        name = 'Posts'
        pageRef = '/posts'
        weight = 10

    [[menus.main]]
        name = 'Galleries'
        pageRef = '/galleries'
        weight = 20

    [[menus.main]]
        name = 'Tags'
        pageRef = '/tags'
        weight = 30
This will override the settings in the theme using toml syntax.
We configure a menu called main, each element of the menu sets:
name: The name of the menu item and what we see in the menu.weight: The order of the menu items, from lowest to highest.pageRef: The path of the page we want to link to in the menu.
We also configure the site title, which we’ll show alongside the menu.
Adding the gallery images
Right now, although we have a gallery page and a list of galleries, we aren’t seeing the images.
The cover image
We’ll add an optional cover image to the galleries section.
base our new template on the existing section layout
$ cp themes/my-theme/layouts/section.html themes/my-theme/layouts/galleries/section.html
themes/my-theme/layouts/section.html
{{ define "main" }}
  <h1>{{ .Title }}</h1>
  {{ .Content }}
  {{ range .Pages }}
    <section>
      {{- $linkTitle := .LinkTitle -}}
      <h2><a href="{{ .RelPermalink }}">{{ .LinkTitle }}</a></h2>
      {{- $coverImageName := .Params.cover | default "cover.jpg" -}}
      {{- with .Resources.GetMatch $coverImageName -}}
        <img src="{{ .RelPermalink }}" alt="{{ $linkTitle }}" />
      {{- end -}}
      {{ .Summary }}
    </section>
  {{ end }}
{{ end }}
Notes:
.Params.cover | default "cover.jpg"We set a variable based on our cover param or using a default value..Resources.GetMatchlooks for a matching resource in the page’s resources, i.e. the same directory.
We can also use Markdown to add an image to the gallery page.
content/galleries/my-gallery/index.md
+++
date = '{{ .Date }}'
draft = true
title = '{{ replace .File.ContentBaseName "-" " " | title }}'
[params]
cover = 'cover.jpg'
+++
A spiffy description of the gallery.
<!--more-->

A longer description of the gallery.
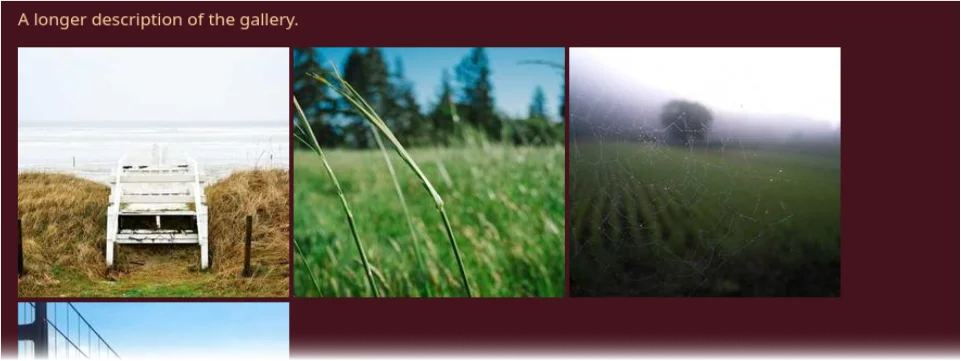
Gallery layout
But to take better advantage of hugo, we can have all galleries display all of their images by overriding the page layout.
base gallery page on the existing page layout
$ cp themes/my-theme/layouts/page.html themes/my-theme/layouts/galleries/page.html
We’ll add all the images to the page.
themes/my-theme/layouts/galleries/page.html
{{ define "main" }}
  <h1>{{ .Title }}</h1>

  {{ $dateMachine := .Date | time.Format "2006-01-02T15:04:05-07:00" }}
  {{ $dateHuman := .Date | time.Format ":date_long" }}
  <time datetime="{{ $dateMachine }}">{{ $dateHuman }}</time>

  {{ .Content }}

  {{- $coverImage := .Params.cover -}}
  {{ range .Resources.ByType "image" }}
    {{ if ne .Name $coverImage }}
      <img src="{{ .RelPermalink }}" width="{{ .Width }}" height="{{ .Height }}" alt="" />
    {{ end }}
  {{ end }}

  {{ partial "terms.html" (dict "taxonomy" "tags" "page" .) }}
{{ end }}
range .Resources.ByType "image"grabs all page resources that are images.if ne .Name $coverImageexcludes the cover image from the list.
We manually added the cover image to the gallery page, but you could also standardise this by using the
.Resources.GetMatch function and include the cover image by default.
We now have a gallery page!
Checkpoint 6: custom content
Let’s commit our changes.
$ git add .
$ git commit -m "6: custom content"
Find the project up to this point here.
7: Adding and updating singular pages
We will often want to add singular pages that serve some purpose other than content, for example, a contact page or a privacy policy.
Organising singular pages
We’ll organise our singular pages under content/singles/contact with a new archetype.
create a new archetype
$ mkdir themes/my-theme/archetypes/singles
$ cp themes/my-theme/archetypes/default.md themes/my-theme/archetypes/singles/index.md
Each singular page will be a leaf bundle, so it can contain its own unique resources.
themes/my-theme/archetypes/singles/index.md
+++
date = '{{ .Date }}'
draft = true
title = '{{ replace .File.ContentBaseName "-" " " | title }}'
url = '/{{ .File.ContentBaseName }}'
[build]
    list = 'never'
+++
We set the url param so relative to the domain, a content/singles/contact/index.md file will be available at
/contact.
The build param is used to control how hugo builds the page, we don’t want these pages to appear in lists.
Adding a singular page
add a contact page
$ ./hugo new singles/contact
add content
content/singles/contact/index.md
+++
date = '2026-04-11T10:30:11+01:00'
draft = true
title = 'Contact'
url = '/contact'
[build]
list = 'never'
+++
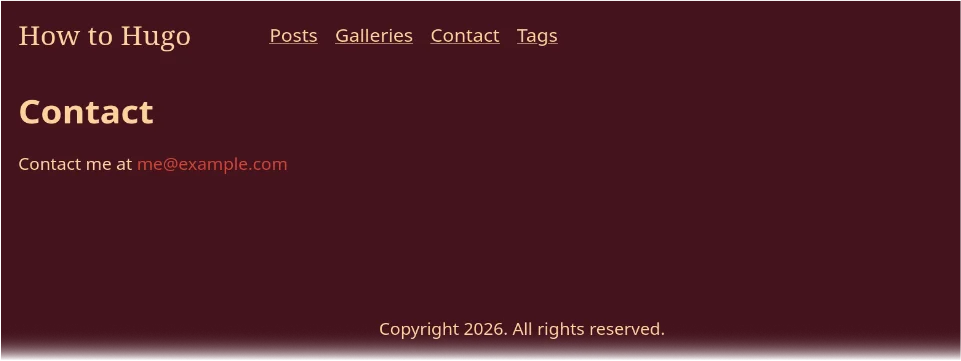
Contact me at me@example.com
Hiding the singular page section
Since this isn’t a normal section, we wouldn’t normally want a page at /singles.
We’ll add an _index.md file to the singles section to hide it.
*create a singles section index
$ ./hugo new singles/_index.md
hide the section
content/singles/_index.md
+++
date = '2026-04-11T10:34:52+01:00'
title = 'Singles'
[build]
    render = 'never'
    list = 'never'
+++
We set build params:
render = 'never'to stop the page being builtlist = 'never'to stop the page being listed
Singular page layout
create a singles page layout
$ cp themes/my-theme/layouts/page.html themes/my-theme/layouts/singles/page.html
remove unnecessary elements
themes/my-theme/layouts/singles/page.html
{{ define "main" }}
  <h1>{{ .Title }}</h1>

  {{ .Content }}
{{ end }}
Adding a page to the menu
Add the page to the main menu
hugo.toml
baseURL = 'https://example.org/'
locale = 'en-us'
title = 'How to Hugo'
theme = 'my-theme'

[menus]
    [[menus.main]]
        name = 'Posts'
        pageRef = '/posts'
        weight = 10

    [[menus.main]]
        name = 'Galleries'
        pageRef = '/galleries'
        weight = 20

    [[menus.main]]
        name = 'Contact'
        pageRef = '/singles/contact'
        weight = 30

    [[menus.main]]
        name = 'Tags'
        pageRef = '/tags'
        weight = 40
Checkpoint 7: single pages
Let’s commit our changes.
$ git add .
$ git commit -m "7: single pages"
Find the project up to this point here.
8: Creating taxonomies
A taxonomy is a way to group content under terms. Right now we have a tags taxonomy, but we can add other
kinds of groupings.
Adding an ‘authors’ taxonomy
We’ll add authors as a new taxonomy, but we’ll need to manually add tags if we want to keep it.
We’ll also add an Authors item to the main menu.
hugo.toml
baseURL = 'https://example.org/'
locale = 'en-us'
title = 'How to Hugo'
theme = 'my-theme'

[menus]
    [[menus.main]]
        name = 'Posts'
        pageRef = '/posts'
        weight = 10

    [[menus.main]]
        name = 'Galleries'
        pageRef = '/galleries'
        weight = 20

    [[menus.main]]
        name = 'Contact'
        pageRef = '/singles/contact'
        weight = 30

    [[menus.main]]
        name = 'Tags'
        pageRef = '/tags'
        weight = 40

    [[menus.main]]
        name = 'Authors'
        pageRef = '/authors'
        weight = 50

[taxonomies]
    tag = 'tags'
    author = 'authors'
Adding authors to content
Add tags and authors
content/posts/my-first-post.md
+++
date = '2026-04-06T23:58:33+01:00'
draft = false
title = 'My First Post'
tags = ['bob&anne', 'dune']
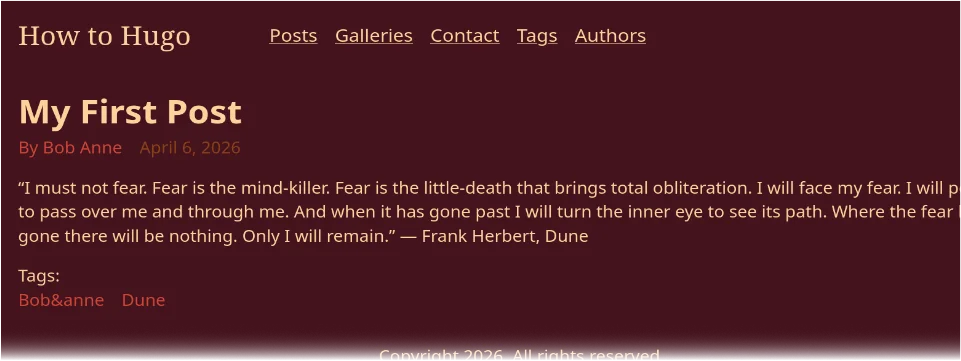
authors = ['Bob', 'Anne']
+++
“I must not fear. Fear is the mind-killer. Fear is the little-death that brings total obliteration. I will face my fear.
I will permit it to pass over me and through me. And when it has gone past I will turn the inner eye to see its path.
Where the fear has gone there will be nothing. Only I will remain.”
― Frank Herbert, Dune
Note the TOML syntax for adding a list; a taxonomy can have any number of terms to group content.
Updating the page layout to show authors
Previously we included authors as a page param, but now we’ll use our taxonomy to display the authors.
themes/my-theme/layouts/posts/page.html
{{ define "main" }}
<h1>{{ .Title }}</h1>
<ul>
{{- with .GetTerms "authors" -}}
<li>By {{ range $index, $element := . }}{{ if gt $index 0 }} {{end}}<a
href="{{ $element.RelPermalink }}">{{ $element.LinkTitle }}</a>{{ end }}</li>
{{- end -}}
<li>
{{- $dateMachine := .Date | time.Format "2006-01-02T15:04:05-07:00" -}}
{{- $dateHuman := .Date | time.Format ":date_long" -}}
<time datetime="{{ $dateMachine }}">{{ $dateHuman }}</time>
</li>
</ul>
{{ .Content }}
{{ partial "terms.html" (dict "taxonomy" "tags" "page" .) }}
{{ end }}
Breaking down the template code:
.GetTerms "authors"gets a list of terms from theauthorstaxonomy.range $index, $element := .We use the range function to set two variables for the index and current element. So for each author term, we’ll have the term and the index.if gt $index 0We check if the index is greater than 0, this lets us check if we need to add a space. We could use CSS instead but for learning purposes we’ll use this approach.{{ $element.LinkTitle }}We use the LinkTitle to get the term name.{{ $element.RelPermalink }}We use the RelPermalink to get the term URL.
A key takeaway here is that a term isn’t just a string, it has other information like the URL of the term page.
Now we can follow author links on posts to see all posts by that author.
Checkpoint 8: taxonomies
Let’s commit our changes.
$ git add .
$ git commit -m "8: taxonomies"
Find the project up to this point here.
9: Shortcodes
As mentioned previously, shortcodes allow us to reuse HTML snippets within our content. It’s also useful for including dynamic JavaScript-based functionality like comments and analytics.
Shortcodes directory
create a directory for shortcodes
$ mkdir themes/my-theme/layouts/_shortcodes
Hugo will use the layout templates in this directory to render shortcodes.
Adding a shortcode for a table of contents
We can use the .TableOfContents function to render a table of contents for the current page, view the documentation
here.
themes/my-theme/layouts/_shortcodes/toc.html
{{ .Page.TableOfContents }}
You can put whatever template code and HTML you want in these shortcode files.
create a new post
./hugo new posts/a-long-post.md
Add a toc shortcode to the page
+++
date = '2026-04-12T21:57:49+01:00'
draft = true
title = 'A Long Post'
+++
# A Long Post
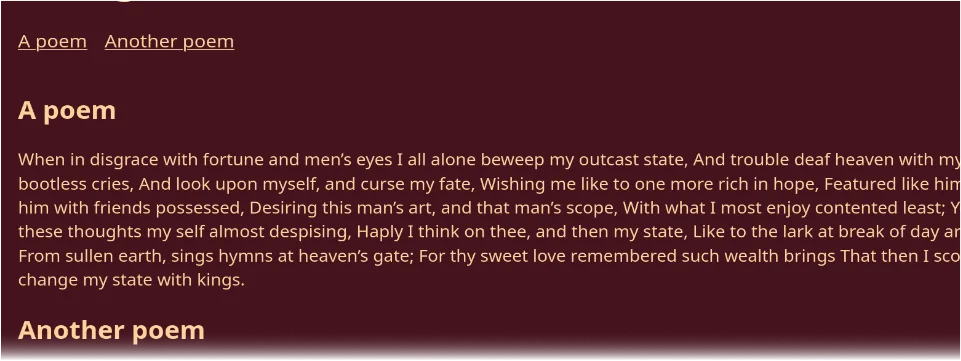
{{< toc >}}
## A poem
When in disgrace with fortune and men’s eyes
I all alone beweep my outcast state,
And trouble deaf heaven with my bootless cries,
And look upon myself, and curse my fate,
Wishing me like to one more rich in hope,
Featured like him, like him with friends possessed,
Desiring this man’s art, and that man’s scope,
With what I most enjoy contented least;
Yet in these thoughts my self almost despising,
Haply I think on thee, and then my state,
Like to the lark at break of day arising
From sullen earth, sings hymns at heaven’s gate;
For thy sweet love remembered such wealth brings
That then I scorn to change my state with kings.
## Another poem
Like the sound of water in a dream, the flowers bloom again
The table of contents will be rendered automatically with links to each heading.
Adding a shortcode to view an image as a modal
create a new post
$ ./hugo new posts/post-with-images/index.md
add some images to the post
$ curl -sL "https://picsum.photos/250/250" -o content/posts/post-with-images/0.jpg
$ curl -sL "https://picsum.photos/250/250" -o content/posts/post-with-images/1.jpg
add modal images to the page
+++
date = '2026-04-12T22:47:45+01:00'
draft = true
title = 'Post With Images'
+++

Image 1:

{{< modal-image src="0.jpg" >}}

Image 2:

{{< modal-image src="1.jpg" >}}
add a shortcode for modal images
themes/my-theme/layouts/_shortcodes/modal-image.html
{{ with .Page.Resources.GetMatch (.Get "src") }}
    <style>
        .modal-image {
            display: none;
            position: fixed;
            z-index: 1;
            left: 0;
            top: 0;
            width: 100%;
            height: 100%;
            overflow: auto;
            background-color: rgba(0,0,0,0.5);
            justify-content: center;
            align-items: center;
        }

        .modal-image_content {
            margin: auto;
            display: block;
            height: 80%;
        }
    </style>

    <img
            src="{{ .RelPermalink }}"
            alt="{{ .Name }}" width="50px"
            onclick="document.getElementById('modal__{{ .Name }}').style.display='flex'"
    />

    <div class="modal-image" id="modal__{{ .Name }}" onclick="this.style.display='none'">
        <img
                class="modal-image_content"
                src="{{ .RelPermalink }}"
                alt="{{ .Name }}"
        />
    </div>
{{ end }}
Some explanation:
.Page.Resources.GetMatchgets a resource from the current page.(.Get "src")gets thesrcparameter, this is thesrcpassed in above.
Note we can include any content in the shortcode, here we have a style block and inline JavaScript.

Checkpoint 9: shortcodes
Let’s commit our changes.
$ git add .
$ git commit -m "9: shortcodes"
Find the project up to this point here.
10: Finishing steps
Hide theme content
Set draft to ’true’ in front matter to hide theme content.
themes/my-theme/content/posts/post-1.md
themes/my-theme/content/posts/post-2.md
themes/my-theme/content/posts/post-3/index.md
draft = true
Show all of our own content
Set draft to ‘false’ in frotn matter to show all content.
content/singles/contact/index.md
content/posts/my-first-bundle/index.md
content/posts/a-long-post.md
content/galleries/my-gallery/index.md
content/galleries/_index.md
draft = false
Set the base URL
You should set the base URL in your hugo.toml file to your actual domain name.
hugo.toml
baseURL = 'https://example.org/'
Optional: Convert to YAML
Some people prefer to use YAML, you should pick the format that suits you best.
convert content front matter to YAML
./hugo convert toYAML --unsafe
change hugo configuration to yaml format
$ mv hugo.toml hugo.yaml
replace file contents with YAML
hugo.yaml
baseURL: https://example.org/
locale: en-us
title: How to Hugo
theme: my-theme
menus:
  main:
    - name: Posts
      pageRef: /posts
      weight: 10
    - name: Galleries
      pageRef: /galleries
      weight: 20
    - name: Contact
      pageRef: /singles/contact
      weight: 30
    - name: Tags
      pageRef: /tags
      weight: 40
    - name: Authors
      pageRef: /authors
      weight: 50
taxonomies:
  tag: tags
  author: authors
Build your site for production
clear the public directory and build the site for production
$ rm -rf ./public
$ ./hugo --minify
You can now sync the contents of the public directory to your web server.
Checkpoint 10: Finish
Let’s commit our changes.
$ git add .
$ git commit -m "10: finish"
Find the project up to this point here.
Conclusion
We now have a working hugo site that you can build upon for your own website, while I’ve tried to speedrun the important parts of building a website with Hugo; I didn’t cover everything, so you can check out the Hugo documentation for more information.
Next Steps (Coming Soon)
In later guides, we will look at deploying our site with git actions and managing our simple website infrastructure using terraform. Look forward to them!